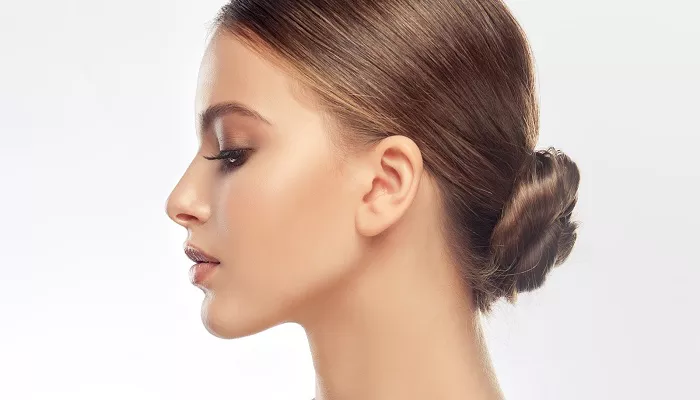
The low bun is a classic hairstyle that never goes out of style. It is both practical and elegant, suitable for everyday wear as well as special occasions. Many hairstylists recommend the low bun for its versatility and timeless appeal. Whether you want a sleek, polished look or a relaxed, messy style, learning the basics of the low bun is essential. This article will guide you through 6 detailed steps to create a flawless low bun with expert tips along the way.
Low Bun Basics: 6 Steps
Step 1: Preparing Your Hair
Before you begin styling, it is important to prepare your hair properly. Start with clean, dry hair. If your hair is freshly washed, applying a light texturizing spray or mousse can help add grip and volume. This will make it easier to work with your hair and help the bun hold better throughout the day.
Use a comb or brush to detangle your hair gently. Smooth out any knots, but avoid making your hair too flat, as some texture can enhance the final look. If you want a sleek finish, a fine-tooth comb can help smooth flyaways. Preparing your hair well is the foundation of a perfect low bun.
Step 2: Creating a Low Ponytail
The next step is to gather your hair into a low ponytail. Position it at the nape of your neck or just above it, depending on your preference. Use a brush to smooth the hair back and eliminate bumps if you want a sleek look. For a softer style, you can leave some face-framing pieces out or gently loosen the hair before securing the ponytail.
Secure the ponytail tightly with a hair elastic. The tightness will help the bun stay in place longer. If you have thick or heavy hair, consider using a strong elastic to prevent slipping. This simple ponytail is the base for your low bun.
Step 3: Twisting or Braiding the Ponytail
This step adds structure and texture to your low bun. You can either twist the ponytail tightly or braid it for a more detailed look. Twisting is quick and creates a classic bun shape. Braiding adds visual interest and can make your style stand out more.
To twist, hold the ponytail and wrap the hair around itself, twisting as you go. If braiding, divide the ponytail into three sections and braid all the way to the ends. Secure the end with a small elastic to keep the twist or braid intact.
This step is optional but highly recommended for added control and style.
Step 4: Forming the Low Bun
Now, wrap your twisted or braided ponytail around the base of the ponytail to form a bun shape. You can wrap it tightly for a polished look or loosely for a more relaxed, messy bun. Hold the hair in place as you wrap, making sure to cover the hair elastic from Step 2.
Once the bun is in place, secure it with bobby pins. Insert the pins around the bun to anchor it firmly. Use as many pins as needed to ensure the bun does not shift throughout the day. For thicker hair, more pins may be necessary.
Step 5: Securing and Setting the Style
After your bun is formed, it is important to secure it so it stays intact. Use additional bobby pins to tuck in any loose strands or flyaways. You can also use hairpins to add extra hold where needed. If you want a softer appearance, gently pull a few strands around your face or at the nape of your neck to loosen the bun slightly.
Finish by applying a medium-hold hairspray. This will keep your style in place without making it look stiff. For a sleek bun, use a smoothing serum or spray to tame flyaways and add shine.
Step 6: Adding Finishing Touches
The final step is to personalize your low bun with finishing touches. You can accessorize your hairstyle with decorative pins, hair combs, or a delicate scarf to complement your outfit. This can elevate a simple low bun into an elegant statement.
For casual looks, leave some strands loose or curl the face-framing pieces for softness. For formal events, keep the bun tight and polished. Experiment with slight variations to find the low bun style that suits you best.
Additional Tips for Perfecting Your Low Bun
- For added volume, tease your hair lightly at the crown before gathering it into a ponytail.
- If your hair is fine or slippery, use a texturizing powder or dry shampoo at the roots for better grip.
- Practice the wrapping technique to get a neat, symmetrical bun.
- Use hairpins that match your hair color to keep the pins discreet.
- Try different partings (center, side, or no part) to change the bun’s overall look.
Why the Low Bun Remains a Favorite
The low bun is favored by hairstylists and women alike because it suits many Women Hairstyle Types. It is suitable for all hair lengths longer than chin length and works well with straight, wavy, or curly hair. The low bun’s adaptability allows it to be worn in professional settings, casual environments, and formal occasions.
Its simplicity makes it accessible for beginners, yet it can also be styled with intricate braids or twists for those seeking more advanced looks. The low bun combines ease, elegance, and timeless style, making it a cornerstone of any good Women Hairstyle Guide.
Conclusion
Mastering the low bun with these 6 essential steps will give you a reliable and chic hairstyle for any occasion. Proper preparation, careful execution, and finishing touches are key to achieving a low bun that looks effortless yet polished. Whether you are aiming for a sleek professional style or a relaxed everyday look, the low bun is a versatile choice that every woman should know how to create.


