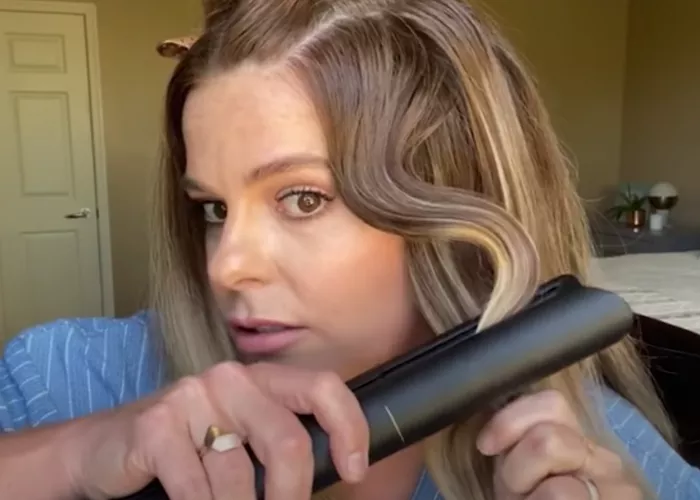
Beach waves are all about embracing imperfection—soft, tousled bends that look undone yet intentional. While saltwater and wind naturally create this texture, a flat iron replicates it by combining heat, tension, and controlled movement. Unlike traditional curling tools that force hair into uniform shapes, a flat iron allows you to manipulate sections with precision, creating irregular waves that mimic nature. The secret lies in the twist-and-glide motion, which bends the hair without forming tight curls. This technique works because the flat iron’s plates gently stretch and shape the hair cuticle, leaving a relaxed wave pattern.
For the best results, your flat iron should have adjustable heat settings and smooth, floating plates (ceramic or tourmaline are ideal). Thin or damaged hair thrives at 300–330°F, while thick or coarse hair needs 350–380°F. Always start with clean, dry hair—damp strands can sizzle and break under heat. Apply a lightweight heat protectant spray evenly from roots to ends. Avoid heavy oils or creams, as they can weigh down waves and reduce longevity.
The 15-Minute Routine for Effortless, All-Day Waves
Step 1: Section Strategically
Divide hair into four horizontal layers using clips:
- Layer 1: From the nape to the ears.
- Layer 2: From the ears to the crown.
- Layer 3: The crown area.
- Layer 4: The top/fringe section (if applicable).
Working in layers ensures every strand gets heat exposure. For a lived-in look, leave the top layer slightly messier than the others.
Step 2: Master the Twist-and-Glide
- Take a 1–2 inch section from the lowest layer.
- Clamp the flat iron 1–2 inches from the roots, then rotate the iron away from your face in a smooth, 90-degree twist.
- Slowly glide the iron down to the ends, maintaining gentle tension.
- Release the hair and let the wave cool without touching it—this sets the shape.
Alternate twist directions (left for some sections, right for others) to avoid uniform curls. For face-framing pieces, angle the iron diagonally toward your cheekbones.
Step 3: Break Up and Texturize
Once all layers are styled, run your fingers through the waves to separate them. Avoid brushes—they flatten volume. For extra texture, scrunch hair with a dab of texturizing paste or spritz with sea salt spray. If waves look too polished, gently tousle the roots with your fingertips.
Advanced Tricks for Different Hair Types and Lengths
Fine or Short Hair
- Use smaller sections (1 inch wide) and lower heat (300–320°F).
- Focus waves mid-length to ends to avoid overwhelming delicate roots.
- Add volume with a root-lifting spray before styling.
Thick or Long Hair
- Opt for higher heat (360–380°F) and larger sections (2+ inches).
- For bohemian volume, lightly backcomb the roots before waving.
- Prevent bulk by trimming layers regularly—blunt ends can look heavy.
Curly or Coily Hair
- Straighten sections first, then add waves to blend with your natural texture.
- Use a curl-defining cream post-styling to enhance definition.
- Avoid over-straightening; embrace your hair’s natural body.
Fix Common Problems in Seconds
Flat Waves: Spritz roots with dry shampoo and blow-dry upside down for 30 seconds.
Frizzy Ends: Smooth with a drop of argan oil, then clamp briefly with the iron on low heat.
Over-Crimped Sections: Dampen the area, re-straighten, then re-wave with a looser twist.
Waves Falling Out: Mist with a flexible-hold hairspray and scrunch.
Make Waves Last 3+ Days: The Overnight Survival Guide
Pre-Styling Prep: Apply volumizing mousse to damp hair before blow-drying.
Sleep Smart: Tie hair into a loose braid or silk scarf-protected bun.
Morning Refresh: Revive waves with a mix of water and conditioner in a spray bottle. Scrunch and air-dry.
Touch-Up Hack: Use the flat iron on cool mode (if available) to reshape key sections without heat damage.
Pro Secrets from Celebrity Stylists
Jennifer Lopez’s Go-To Trick: After styling, wrap waves around large Velcro rollers for 10 minutes to amplify volume.
Blake Lively’s Red Carpet Tip: Apply a shine serum only to the ends for a glossy, sun-kissed finish.
Zendaya’s Texture Hack: Rub a matte texturizing paste between palms and “prayer hands” over waves for grit.
Protect Your Hair: Non-Negotiable Care Tips
Weekly Deep Conditioning: Use a mask with keratin or coconut oil to repair heat damage.
Trim Every 8 Weeks: Split ends sabotage wave formation.
Heat-Free Days: Give hair a break 2–3 times weekly—try slicked-back buns or claw clips.
Clarify Monthly: Remove product buildup with a sulfate-free clarifying shampoo.
Conclusion
Beach waves aren’t meant to be perfect. The more you fuss, the less natural they look. If a section feels too tight, pull it apart with your fingers. If waves fall flat, spritz with texturizing spray and shake your head upside down. Remember, even salon stylists prioritize movement over precision. With practice, your flat iron will become a gateway to endless texture—no beach required. Now go forth and conquer those waves—your effortless, head-turning style awaits!
Related topics:
5 Bob Haircuts For Older Women With Thin Hair
Haircuts for Thin Hair: Flattering Styles for Older Women
Pixie Haircuts For Older Women With Thin Hair


